Uninstall measurement
Overview
Complete the following sections to set up, integrate, and test iOS uninstall measurement:
- Creating a
.p12certificate and sending it to the marketer. - Configuring the SDK for uninstall measurement.
- Testing uninstall measurement.
Creating a .p12 certificate
.p12 certificateTo enable uninstall measurement, a .p12 certificate is required.
NoteCurrently,
.p8certificates are not supported.
To create a .p12 certificate:
Step 1: Create a Certificate Signing Request (CSR)
1.1. On your Mac, open Keychain Access. Go to Keychain Access > Certificate Assistant > Request a Certificate From a Certificate Authority.

1.2. Fill the form. Select Saved to disk and click Continue.

Step 2: Select App ID
2.1. If your Apple App ID is already registered, locate it in Apple Developer Members Center and skip to step 2.8.
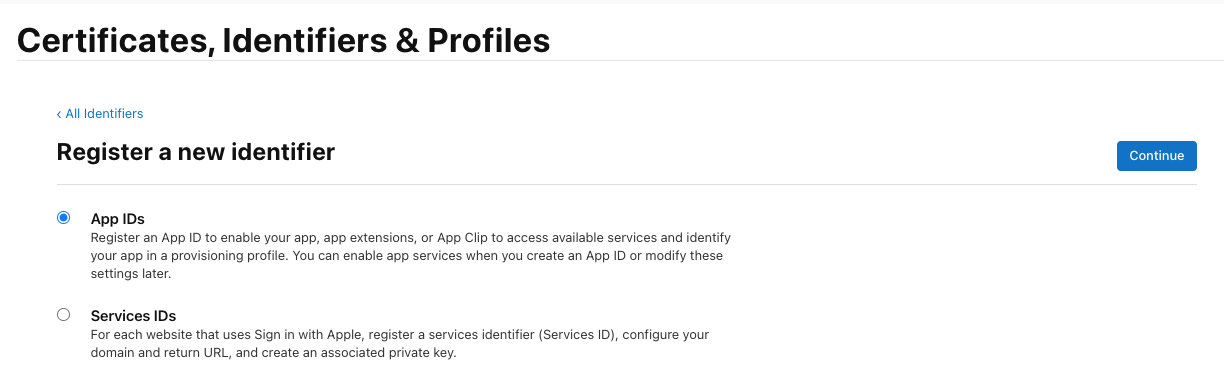
If you need to create a new Apple App ID, in the Apple Developer Members Center, Go to Identifiers and click +.
.png")
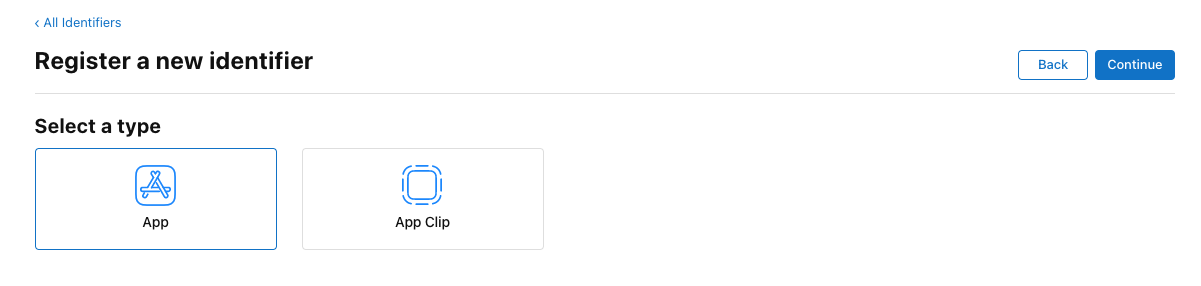
2.2. Choose App IDs and click continue
2.3. Choose App and click continue
2.4. Under Register an App ID, in the Description field, provide the description for your app.
2.5. In the Bundle ID field, enter the app Bundle ID.
2.6. Click Continue.
2.7. Under Edit your App ID Configuration, select Push Notifications and click Configure to continue with the setting. Once your done skip to Step 3: Upload CSR below.
2.8. In the Register an App ID view, under Capabilities, check Push Notifications and click Configure (Edit if it was previously configured). If the Configure/Edit button is not available, you might not have the required permissions.

Step 3: Upload CSR
3.1. Choose whether to create a Production or a Development SSL Certificate (see note) and click Create Certificate.

NoteUse a Production SSL Certificate for published apps. If your app is unpublished and is in active development, you might want to work with a Development SSL Certificate. For example, if your app isn't ready to be published yet, a Development SSL Certificate would let you test Push-related functionalities in TestFlight.
3.2. Upload the CSR you created in step 1 and click Continue.

3.3. Once the Download button appears, you are ready to download. You may need to reload the page for this to update. Download the newly created certificate.

Step 4: Create a .p12 file
4.1. Open the .cer certificate. Opening the certificate will open Keychain Access.
4.2. In the Keychain Access, your certificate is shown under My Certificates. Select the certificate that was just added to Keychain Access.
4.3. Right-click on your certificate and select Export.

4.4. Click save. Make sure to use the Personal Information Exchange (.p12) format.

NoteIf you are renewing either your Development or Production Push SSL Certificate, follow the steps listed previously. There is no need to revoke the previous certificate to make this change. Two production certificates can be in use at the same time, allowing you to continue using the old certificate while uploading the new one.
Step 5: Upload .p12 to AppsFlyer
Send the .p12 certificate to the marketer to upload to AppsFlyer.
SDK setup
Add the following code to your AppDelegate:
    	//add UserNotifications.framework
import UserNotifications
func application(_ application: UIApplication, didFinishLaunchingWithOptions launchOptions: [UIApplicationLaunchOptionsKey: Any]?) -> Bool {
        // ...
        application.registerForRemoteNotifications()
        return true
      }

     // Called when the application sucessfuly registers for push notifications
      func application(_ application: UIApplication, didRegisterForRemoteNotificationsWithDeviceToken deviceToken: Data) {
        AppsFlyerLib.shared().registerUninstall(deviceToken)
      }
// AppDelegate.h
#import <AppsFlyerLib/AppsFlyerLib.h>
@interface AppDelegate : UIResponder <UIApplicationDelegate, AppsFlyerLibDelegate>
// AppDelegate.m
- #import <UserNotifications/UserNotifications.h>
- (BOOL)application:(UIApplication *)application didFinishLaunchingWithOptions:(NSDictionary *)launchOptions {
// The userNotificationTypes below is just an example and may be changed depending on the app
UNUserNotificationCenter *center = [UNUserNotificationCenter currentNotificationCenter];
center.delegate = self;
[center requestAuthorizationWithOptions:(UNAuthorizationOptionSound | UNAuthorizationOptionAlert | UNAuthorizationOptionBadge) completionHandler:^(BOOL granted, NSError * _Nullable error) {
}];
[[UIApplication sharedApplication] registerForRemoteNotifications];
// if you do not use push notificaiton in your app, uncomment the following line
//application.applicationIconBadgeNumber = 0;
}
- (void)application:(UIApplication *)application didRegisterForRemoteNotificationsWithDeviceToken:(NSData *)deviceToken {
[[AppsFlyerLib shared] registerUninstall:deviceToken];
}
}Enabling push notifications in background mode
If you are only using silent push notifications, make sure to enable Remote Notifications in Background Modes in your app's Capabilities:
- In XCode, select your project.
- Select your target.
- Switch to Capabilities tab.
- Toggle Background Modes on.
- Check Remote notifications.


Testing uninstall measurement
To test iOS uninstall measurement:
- Install the app.
- Uninstall the app. Note! You can uninstall the app immediately after installing it.
When testing uninstalls from XCode or TestFlight it is important to let our SDK know that the token is generated from a Sandbox environment. Use the following APIs:
AppsFlyerLib.shared().useUninstallSandbox = true[AppsFlyerLib shared].setUseUninstallSandbox = true;Example
import UserNotifications

func application(
  _ application: UIApplication,
  didFinishLaunchingWithOptions launchOptions: [UIApplicationLaunchOptionsKey: Any]?
) -> Bool {

    AppsFlyerLib.shared().useUninstallSandbox = true
    application.registerForRemoteNotifications()

    return true
}

// Called when the application successfully registers for push notifications
func application(
  _ application: UIApplication,
  didRegisterForRemoteNotificationsWithDeviceToken deviceToken: Data
) {
    AppsFlyerLib.shared().registerUninstall(deviceToken)
}
Note
setUseUninstallSandboxmust be called before callingregisterUninstall.
Considerations
Uninstalls do not immediately appear in the AppsFlyer dashboard. Due to the Apple Push Notification service:
- It takes 9 days on average for iOS uninstalls to appear in reports.
- It can take more than a month for iOS uninstalls originating from sandbox environments to appear in reports.
- The date of the uninstall is the date on which the uninstall is reported. For example:
- Day 1: a user installs your app
- Day 4: a user uninstalls your app
- Day 12: Apple Push Notification Service reports app removal 8 days after the uninstall
- Day 13: Uninstall data appear on AppsFlyer dashboard and raw data